Build AWS CodePipeline CI/CD for your Django Application
Posted on February 15, 2019 in tutorial
Assumption: For this tutorial, I am assuming you already have an EC2 instance where you've configured and deploy a Django application.
In previous tutorial, you learnt about syncing your BitBucket repository to AWS CodeCommit. Now, since your source code is already into AWS CodeCommit, you can now setup AWS CodePipeline for CI/CD.
This tutorial will be a little bit long and I will guide you to setup AWS CodePipeline for your Django application step by step with no step skipped.
Okay, Let's begin!
Step 0 (True programmer starts counting from zero ;) )
- Go to AWS Console and select AWS CodePipeline which is under the Developer Tools section. Or you can also search for AWS CodePipeline by typing the name under Find Services
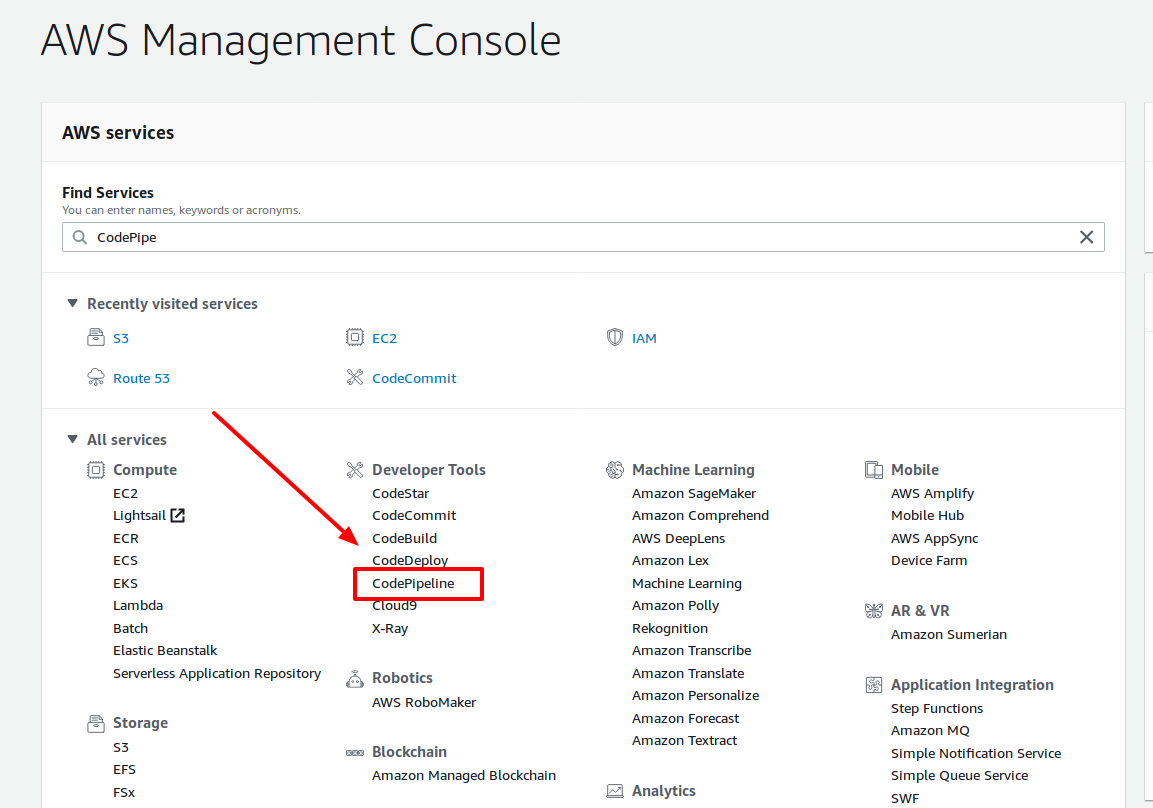
AWS Console
Step 1
- Once you are in AWS CodePipeline click on Create pipeline button. You'll be then redirected to Choose pipeline settings
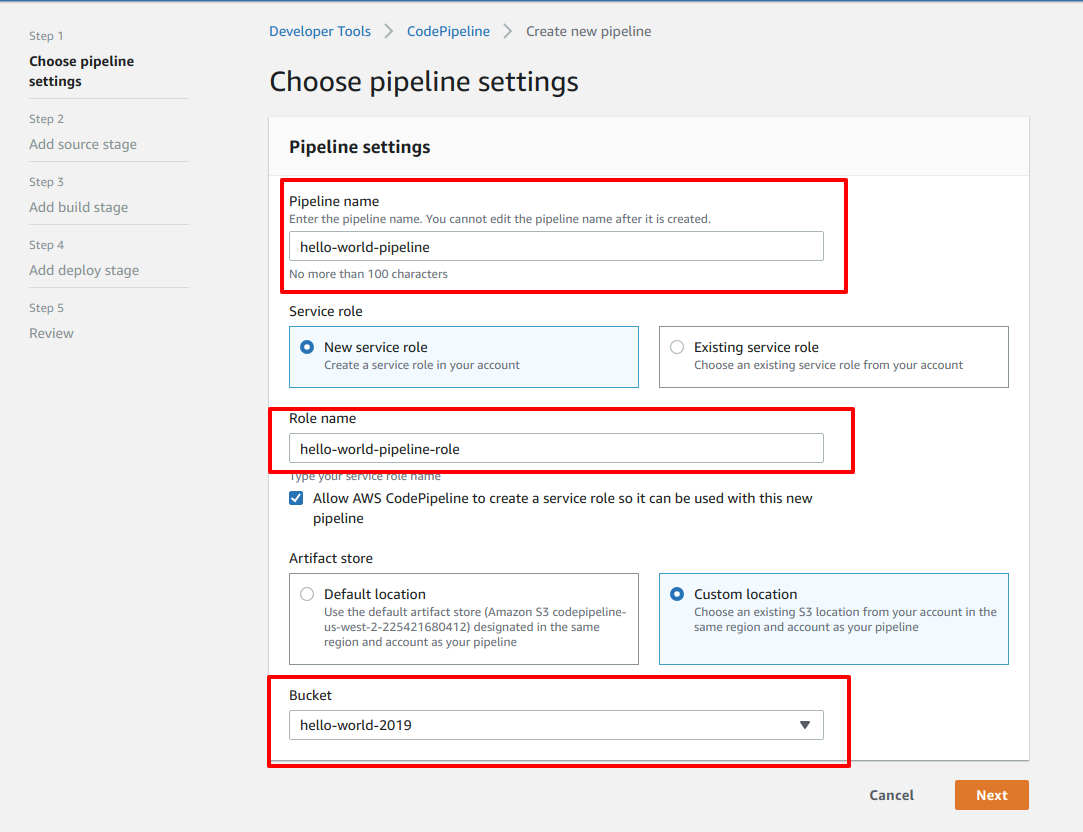
- Give yor pipeline a name under the Pipeline name input field.
- Select New service role under the Service role section.
- Under Role name section, you'll be provided a default role name. But, you may wish to give a proper name which you can remember. In that case, provide your own Role name.
- Check the checkbox that says Allow AWS CodePipeline to create a service role so it can be used with this new pipeline
- Under Artifact store, select Custom location. And here's a tricky part. Artifacts are files that is generated after the CI part is completed. These artifacts need to be stored somewhere. In CodePipeline's case, it's the S3 bucket. If you choose Default location, your artifacts will be stored in the S3 location defined by the CodePipeline itself. In my case, I choose to store my artifacts in my own S3 bucket. Here's a tutorial if you don't know how to create a S3 bucket.
- After filling up this form, click the Next button.
Step 2
- After clicking Next at the end of Step 1, you'll see another form where you'll Add source
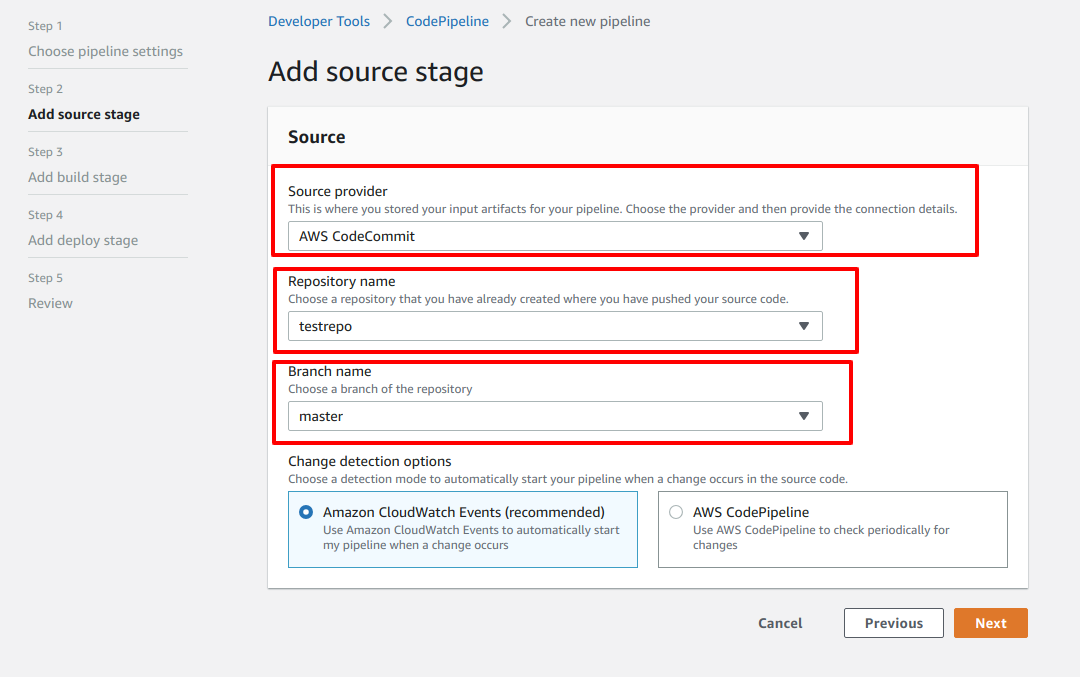
- Select Source provider. In this case, I am selecting AWS CodeCommit because I've already synced my BitBucket repository to AWS CodeCommit.
- Select your Repository name from the drop down option.
- Select the Branch name from the dropdown option. This Branch name indicates triggering of CI when a commit is made to this branch.
- On Change detection options select the recommended option Amazon CloudWatch Events
- Click Next and start Step 3
Step 3
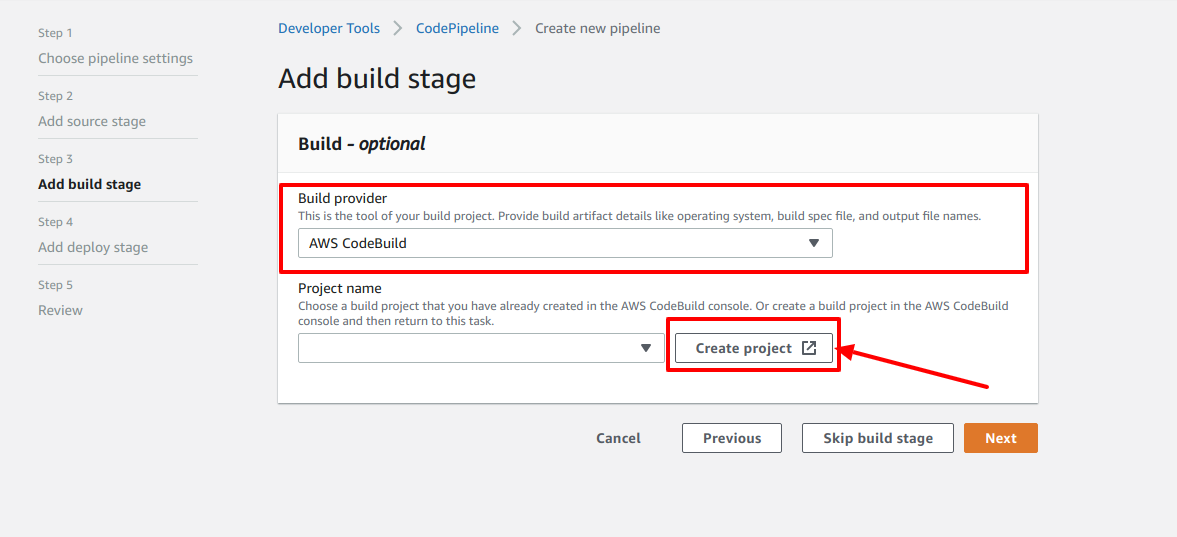
- Select Build provider as AWS CodeBuild
- Now, you need to setup a Project for AWS CodeBuild. Click on Create project button as shown in the picture.
- When you click that Create project, a new window will open where you will setup a CodeBuild project. Let's call it Step 4 for now. Now, let's jump to Step 4
Step 4
I'll be breaking down this step into small chunks.
Step 4-1 (Create build project)
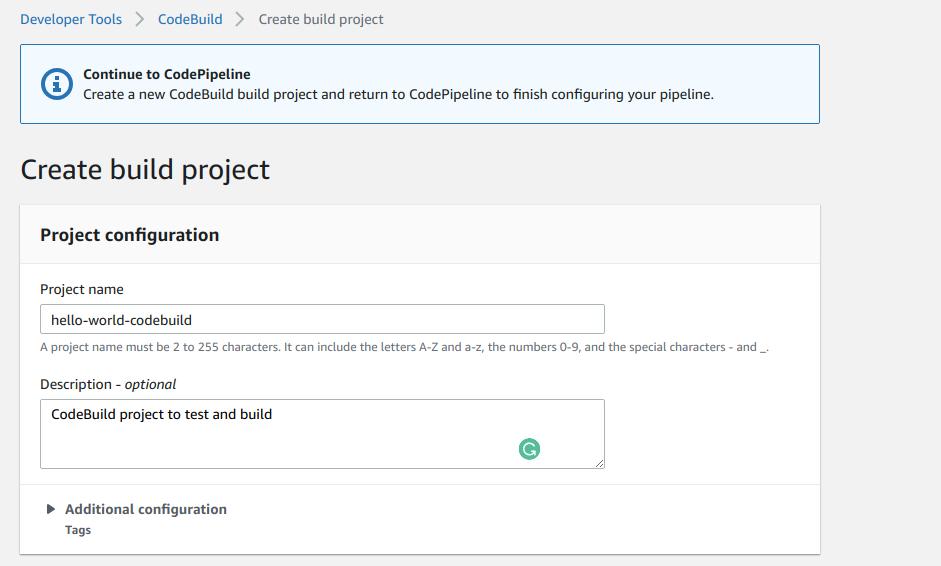
- Give your project a name under Project name input field.
- Give a project Description if you like. It's totally optional but it's a good practice to describe what it does.
- You can add tags to your project but, I am leaving it blank for now.
Step 4-2 (Environment)
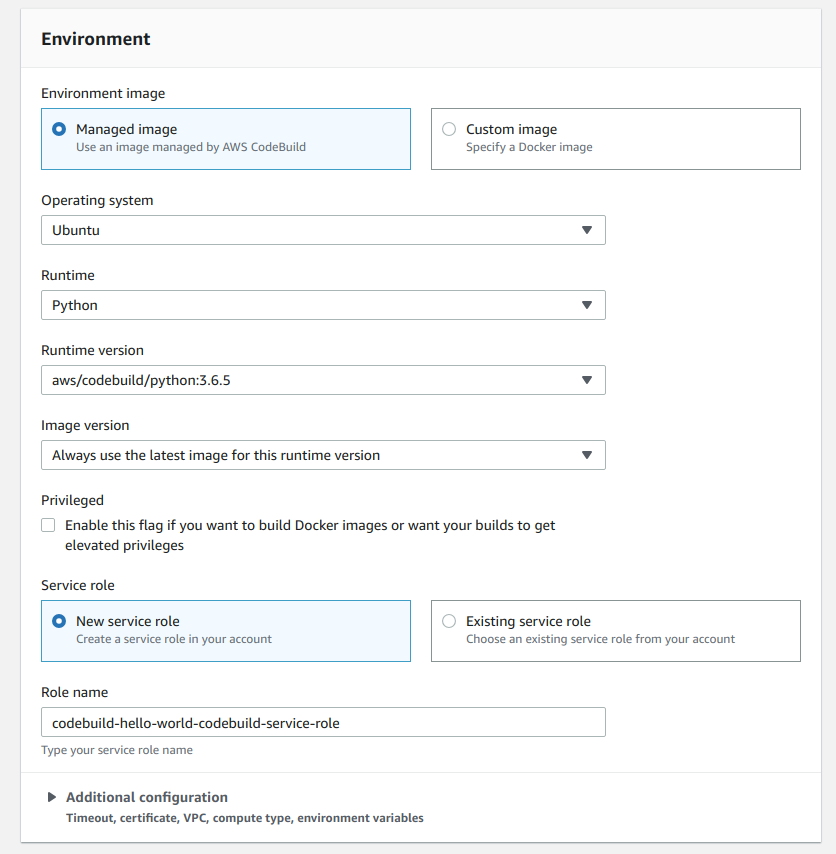
- Just below Create build project, you'll see Environment configuration
- Select Managed image under Environment image section
- Select Operating system as Ubuntu
- Runtime Python (Remember, we are doing CI for Django application)
- aws/codebuild/python:3.6.5 as Runtime version
- Select Always use the latest image for this runtime version under the Image version section
- I am not selecting Privileged option. It's description is self explanatory. If you want more details, see the AWS CodeBuild official documentation
- Choose New service role under the Service role section. We are selecting New service role because we haven't created any role yet for the code build from IAM. So, we'll just create a new one.
- Give a proper Role name so that you can remember and if you see it in the IAM console, you'll just instantly recognize that this is a role or AWS CodeBuild
- I am leaving Additional configuration as empty. This is where you set up Environment variables, system configuration and so on. You can setup some Additional configuration if you like
Step 4-3 (Buildspec)
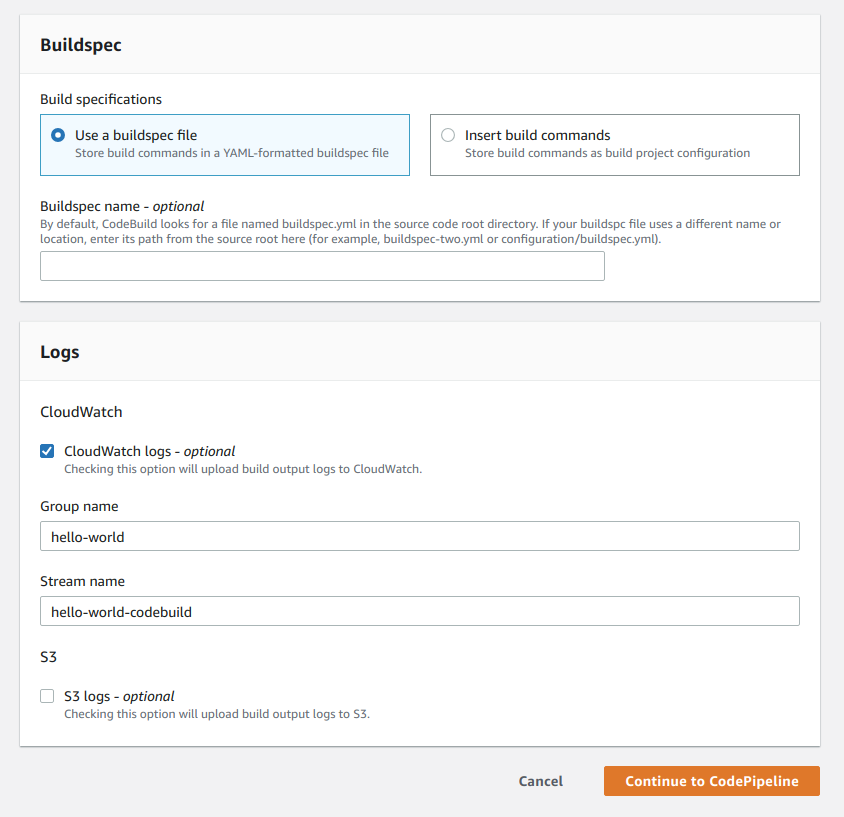
- Select Use a buildspec file under Build specifications
- Under the Buildspec name section, you can add your own custom name if you have custom buildspec yml file but that's completely optional
- Fill out the Logs section. Your build logs are all streamed to AWS CloudWatch if you want. You can also use S3 to store your logs. In my case, I chose AWS CloudWatch and gave a Group name and Stream name
- Now click on Continue to CodePipeline button and you will be redirected to that page (Step 3)
Step 5
- After Step 4-3, you'll be redirected to that Add build stage page and you'll see your newly created build project. If you don't see it there, then just refresh the page.
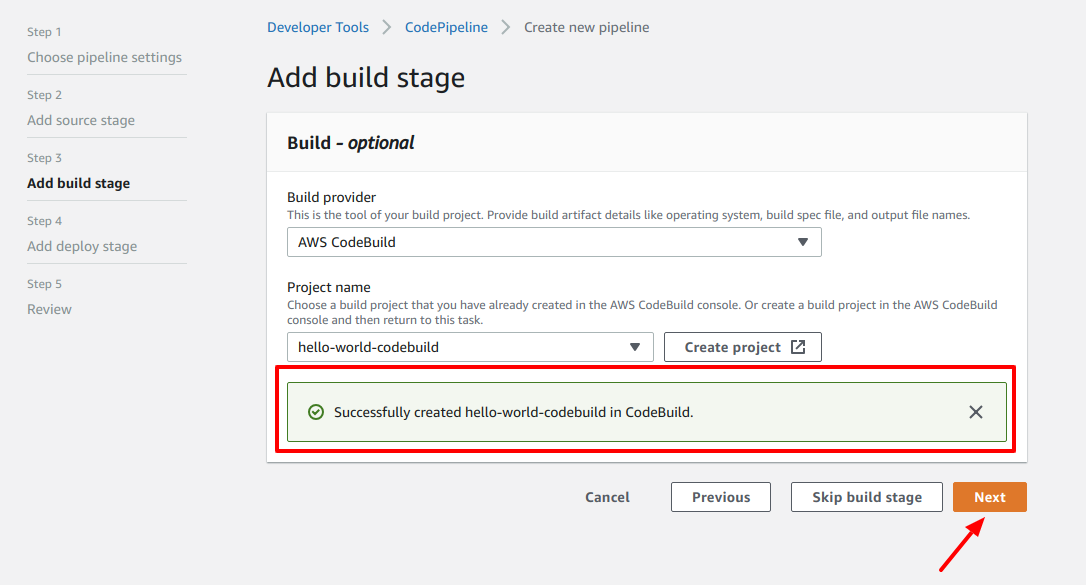
- Now, click the Next button.
Step 6

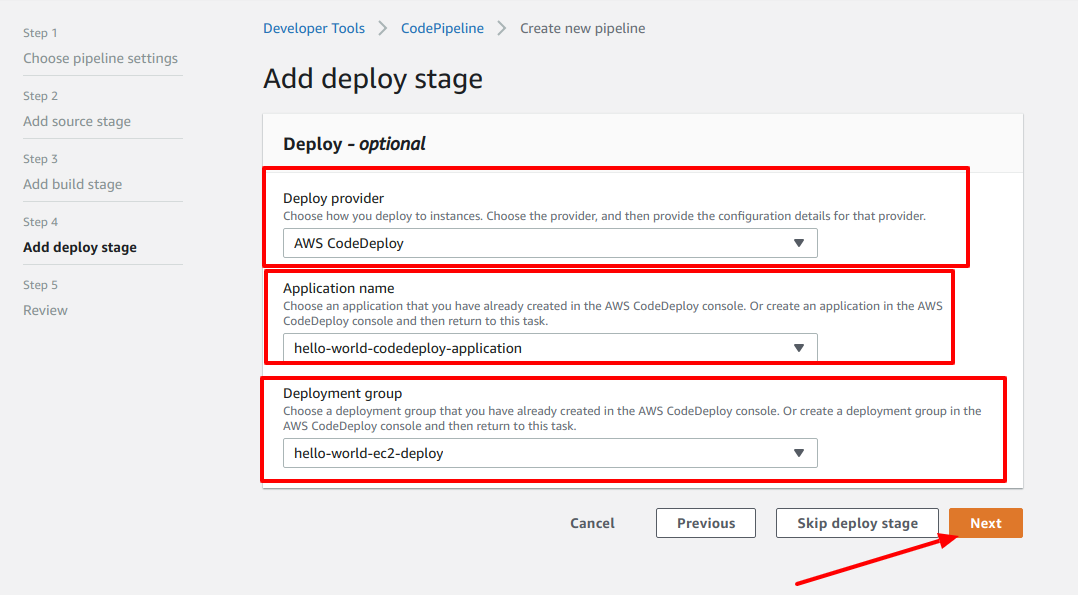
- This step is called Add deploy stage
- First, choose the deploy provider. Select AWS CodeDeploy
- Under the Application name section, you should choose the CodeDeploy application. Since, we haven't yet created the CodeDeploy application, let's just create one. Don't close this browser tab. Just open new browser tab and go to Step 7
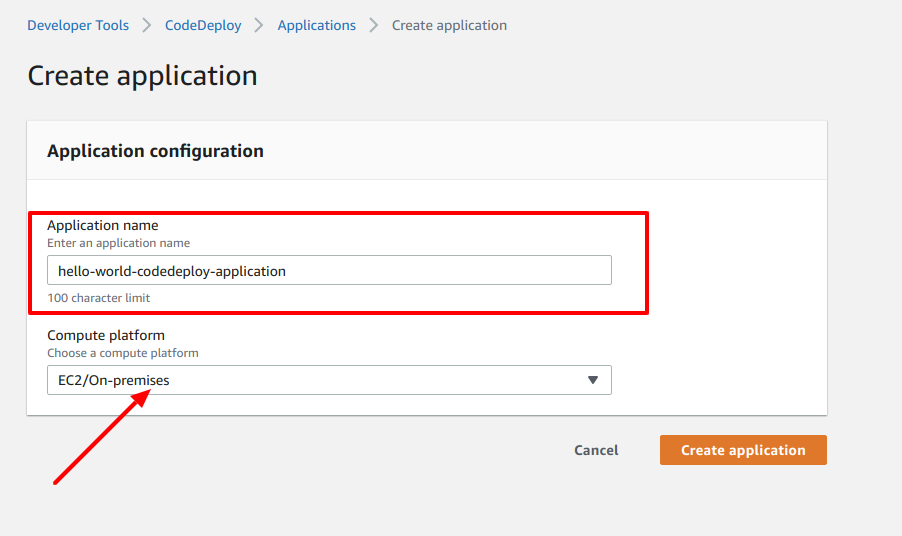
Step 7
- To create the AWS CodeDeploy application, first go to the CodeDeploy section from AWS Console and click on the Create application button. You'll then see Application configuration form. Give your application a name Application name and choose the Compute platform as EC2/On-premises since we are deploying our application on our EC2 server.
- After you create the CodeDeploy application, we need to divert a little bit to setup a New service IAM Role and a Deployment group. We'll continue from Step 6 after setting up the deployment group. For now, let's go to step 8. We'll revisit Step 6 after this.
Step 8 (Create New service IAM Role for CodeDeploy)
- Go to the AWS IAM Console
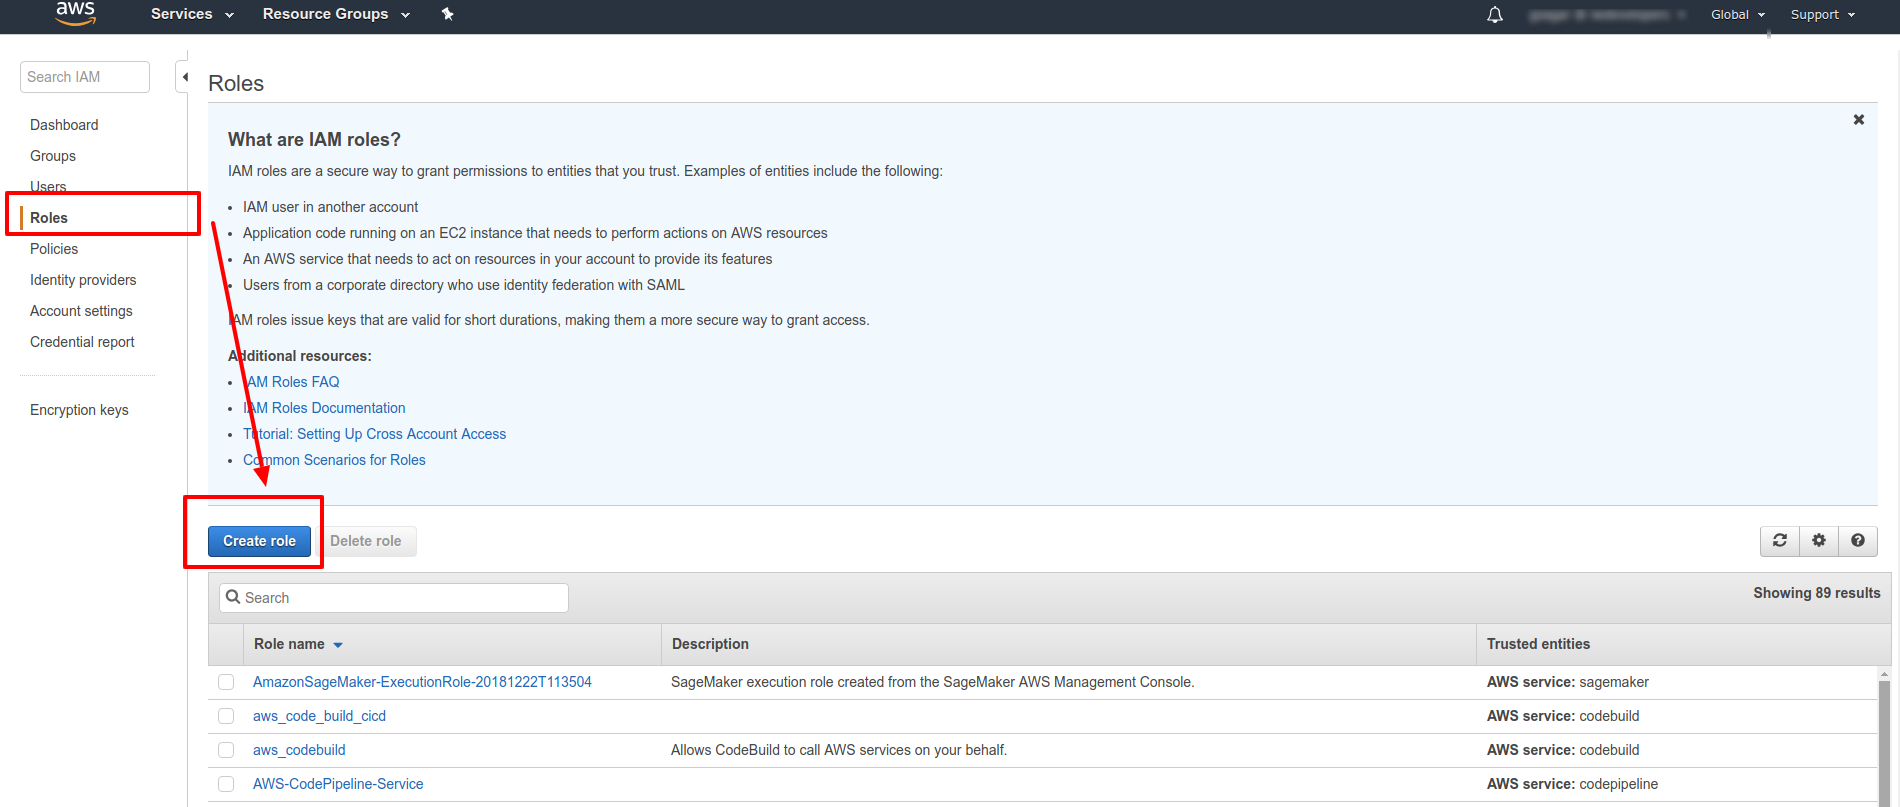
- Click on Roles on the sidebar menu
-
Then click on Create role button.
-
Select CodeDeploy and also CodeDeploy under Select your use case
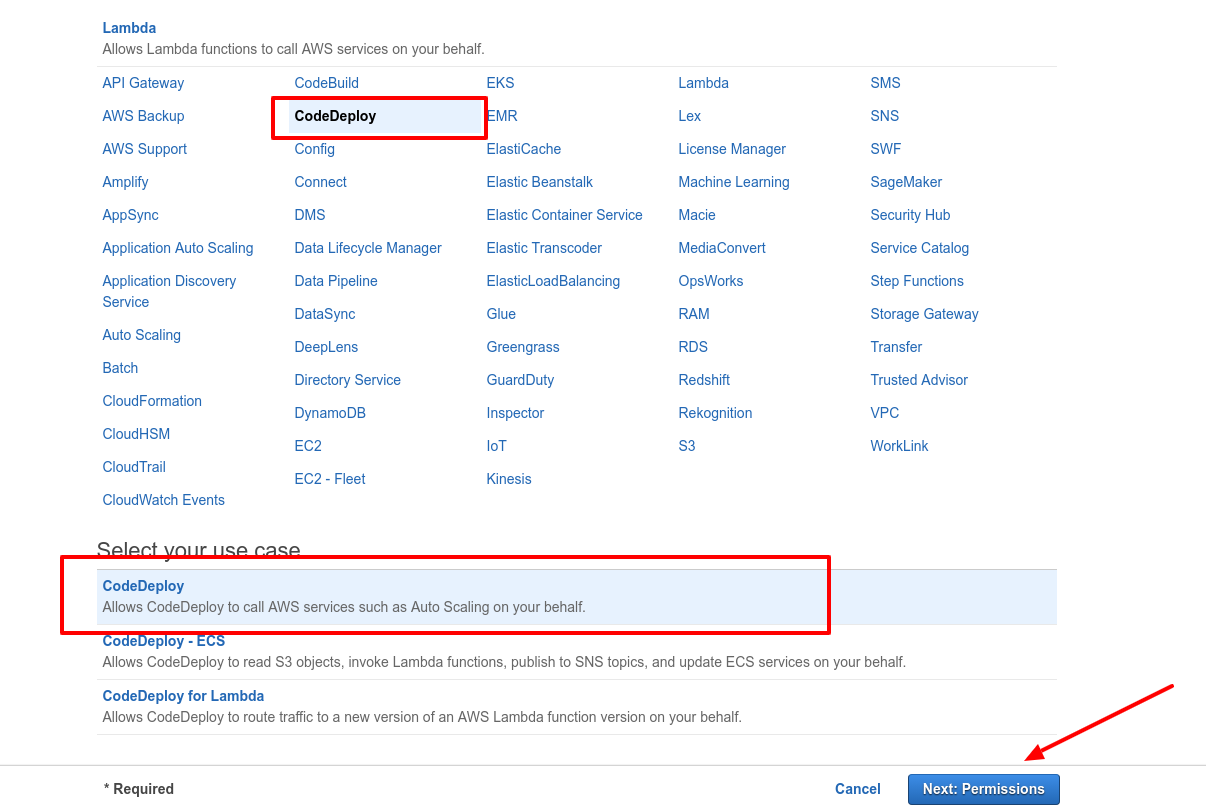
- You'll see something like this:

- Click Next: Tags
-
Give your role a tag with Name and Value if you like
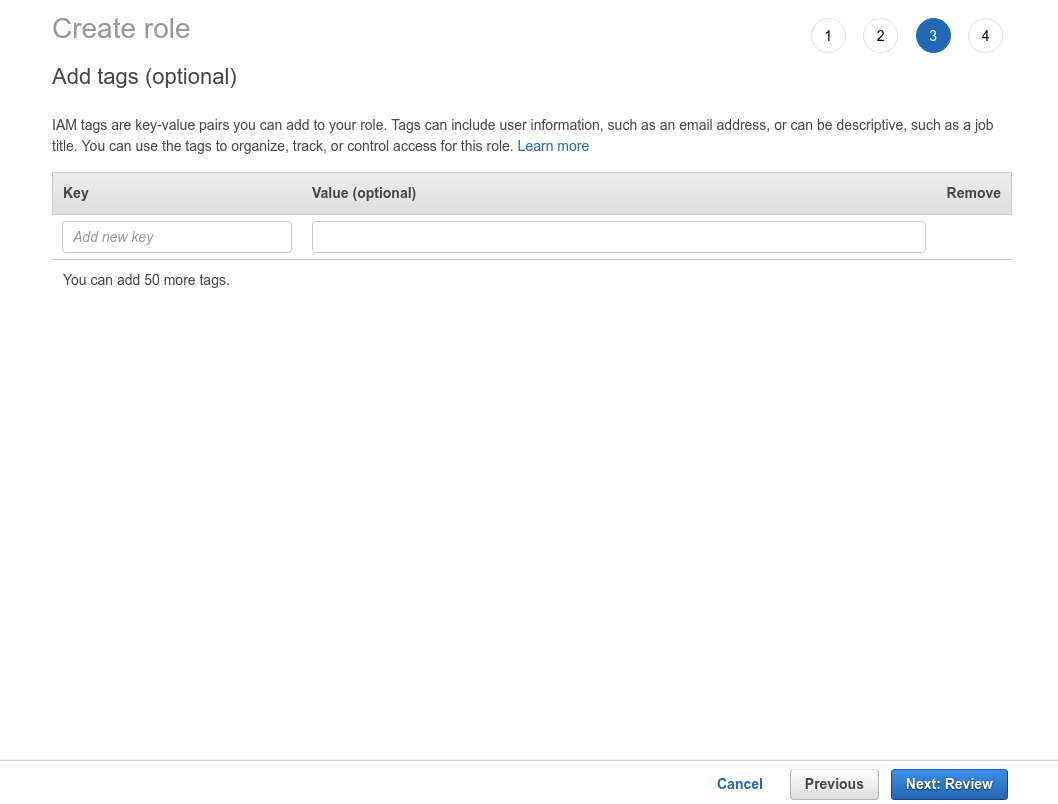
-
Click Next: Review button
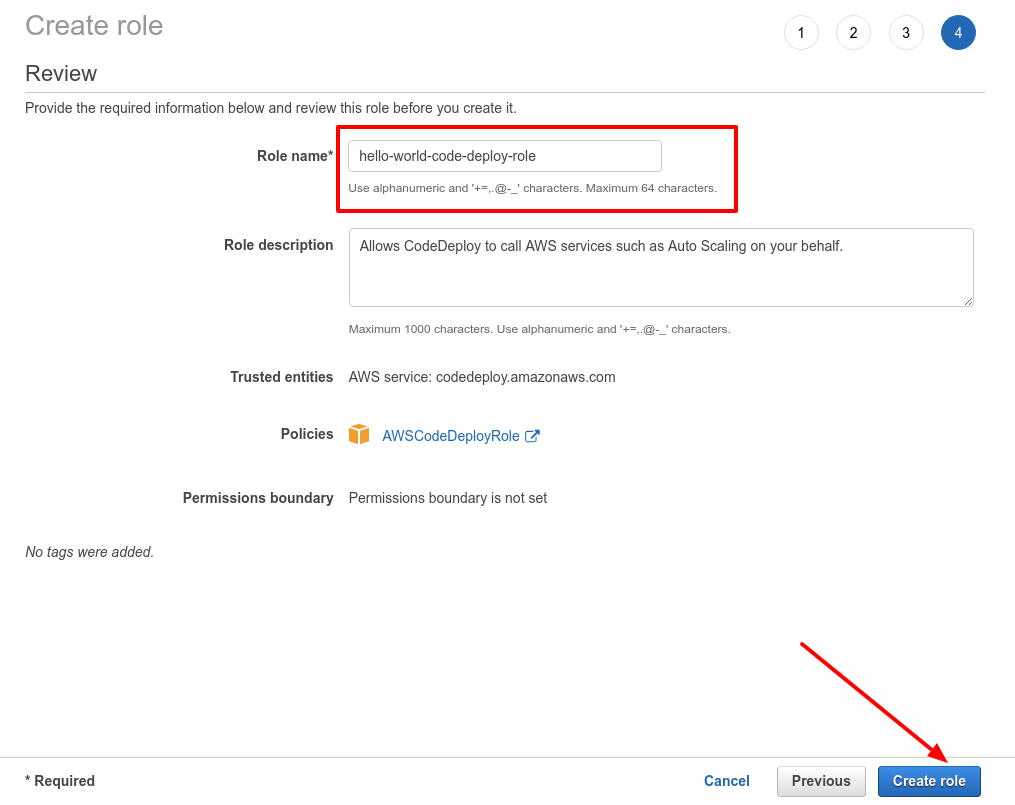
-
Give your role a name. We'll be using this role while creating deployment group.
- Then click on Create role button
Step 9 (Create deployment group)
- Under CodeDeploy > Application section, you'll see the CodeDeploy application name hello-world-codedeploy-application that you just created in Step 7
- Click on the application link and under the Deployment groups tab, you'll see a button that says Create deployment group. Click that.
- You'll see a form like this:
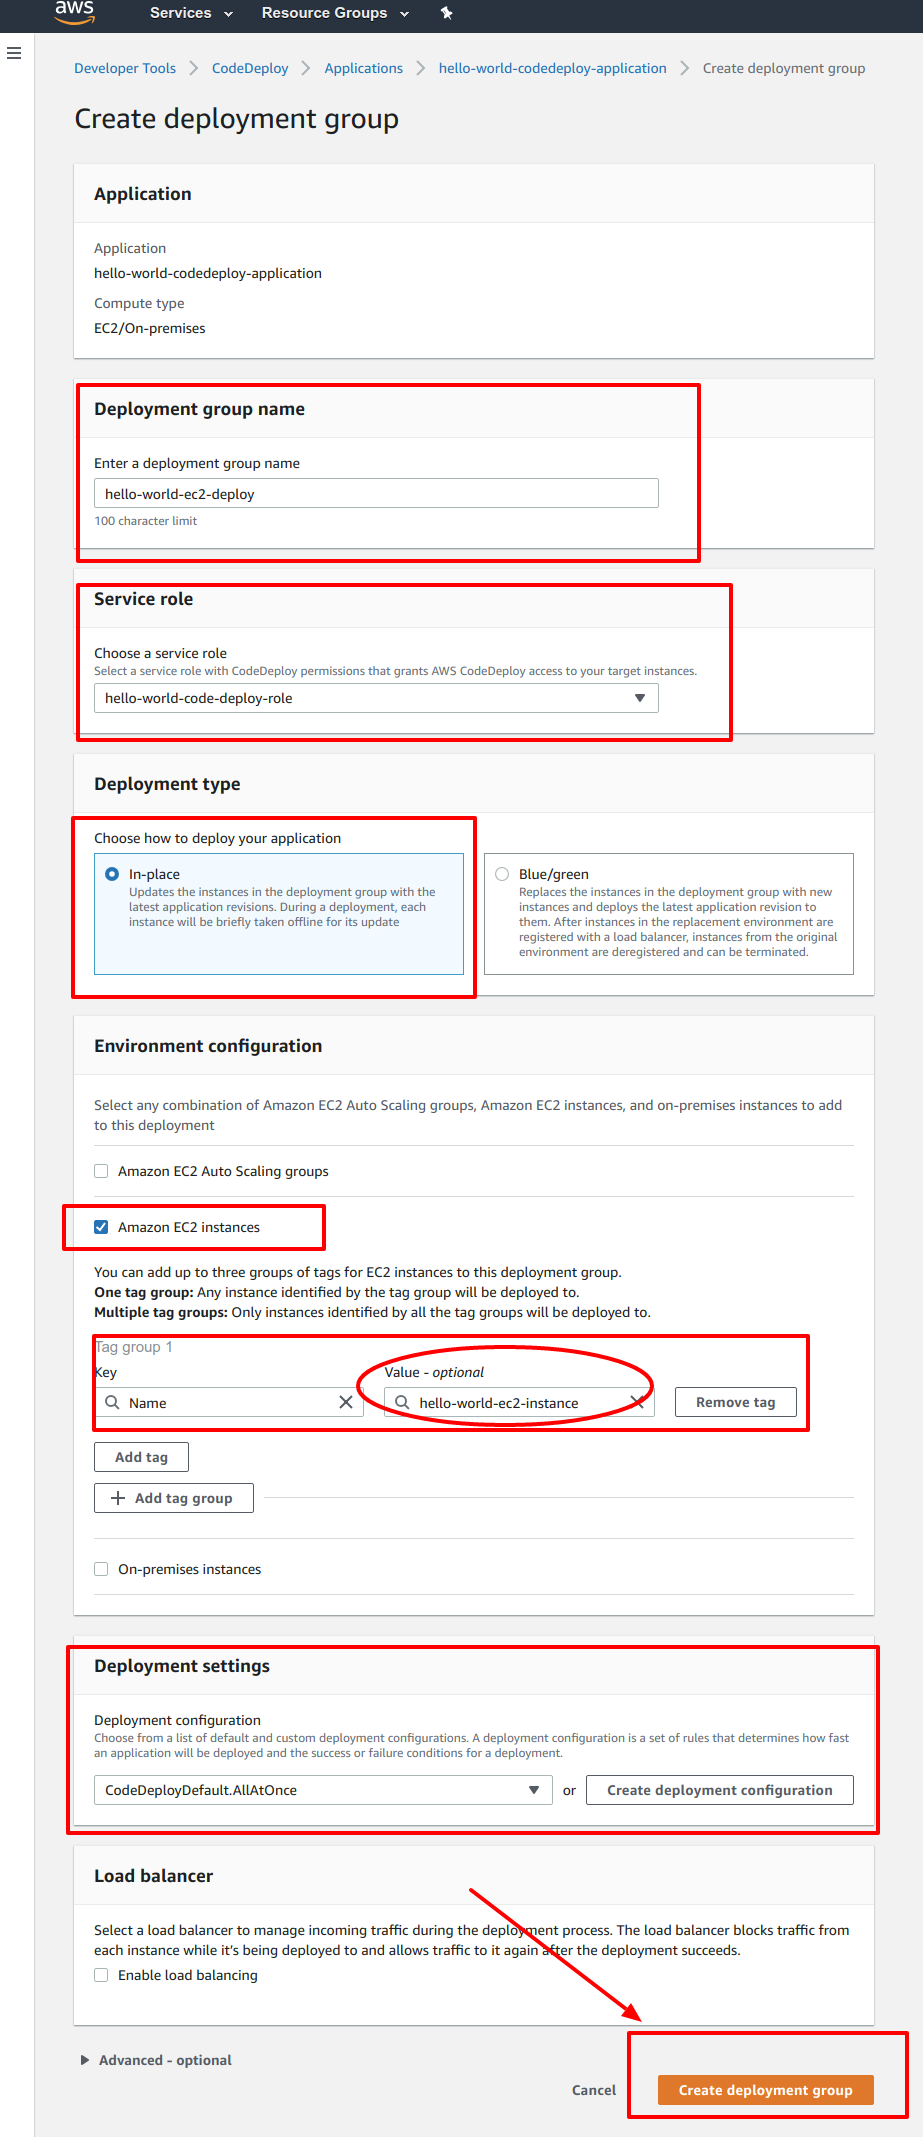
-
Under the Service role section, select the service role that you just created on Step 9
-
Under Environment configuration section, select Amazon EC2 instances. Then add tags. These tags are actually the EC2 instance tag that you've already setup for Django application deployment
-
Fill out the form and click Create deployment group button
- Your deployment group will be created and you'll see a page just like this:
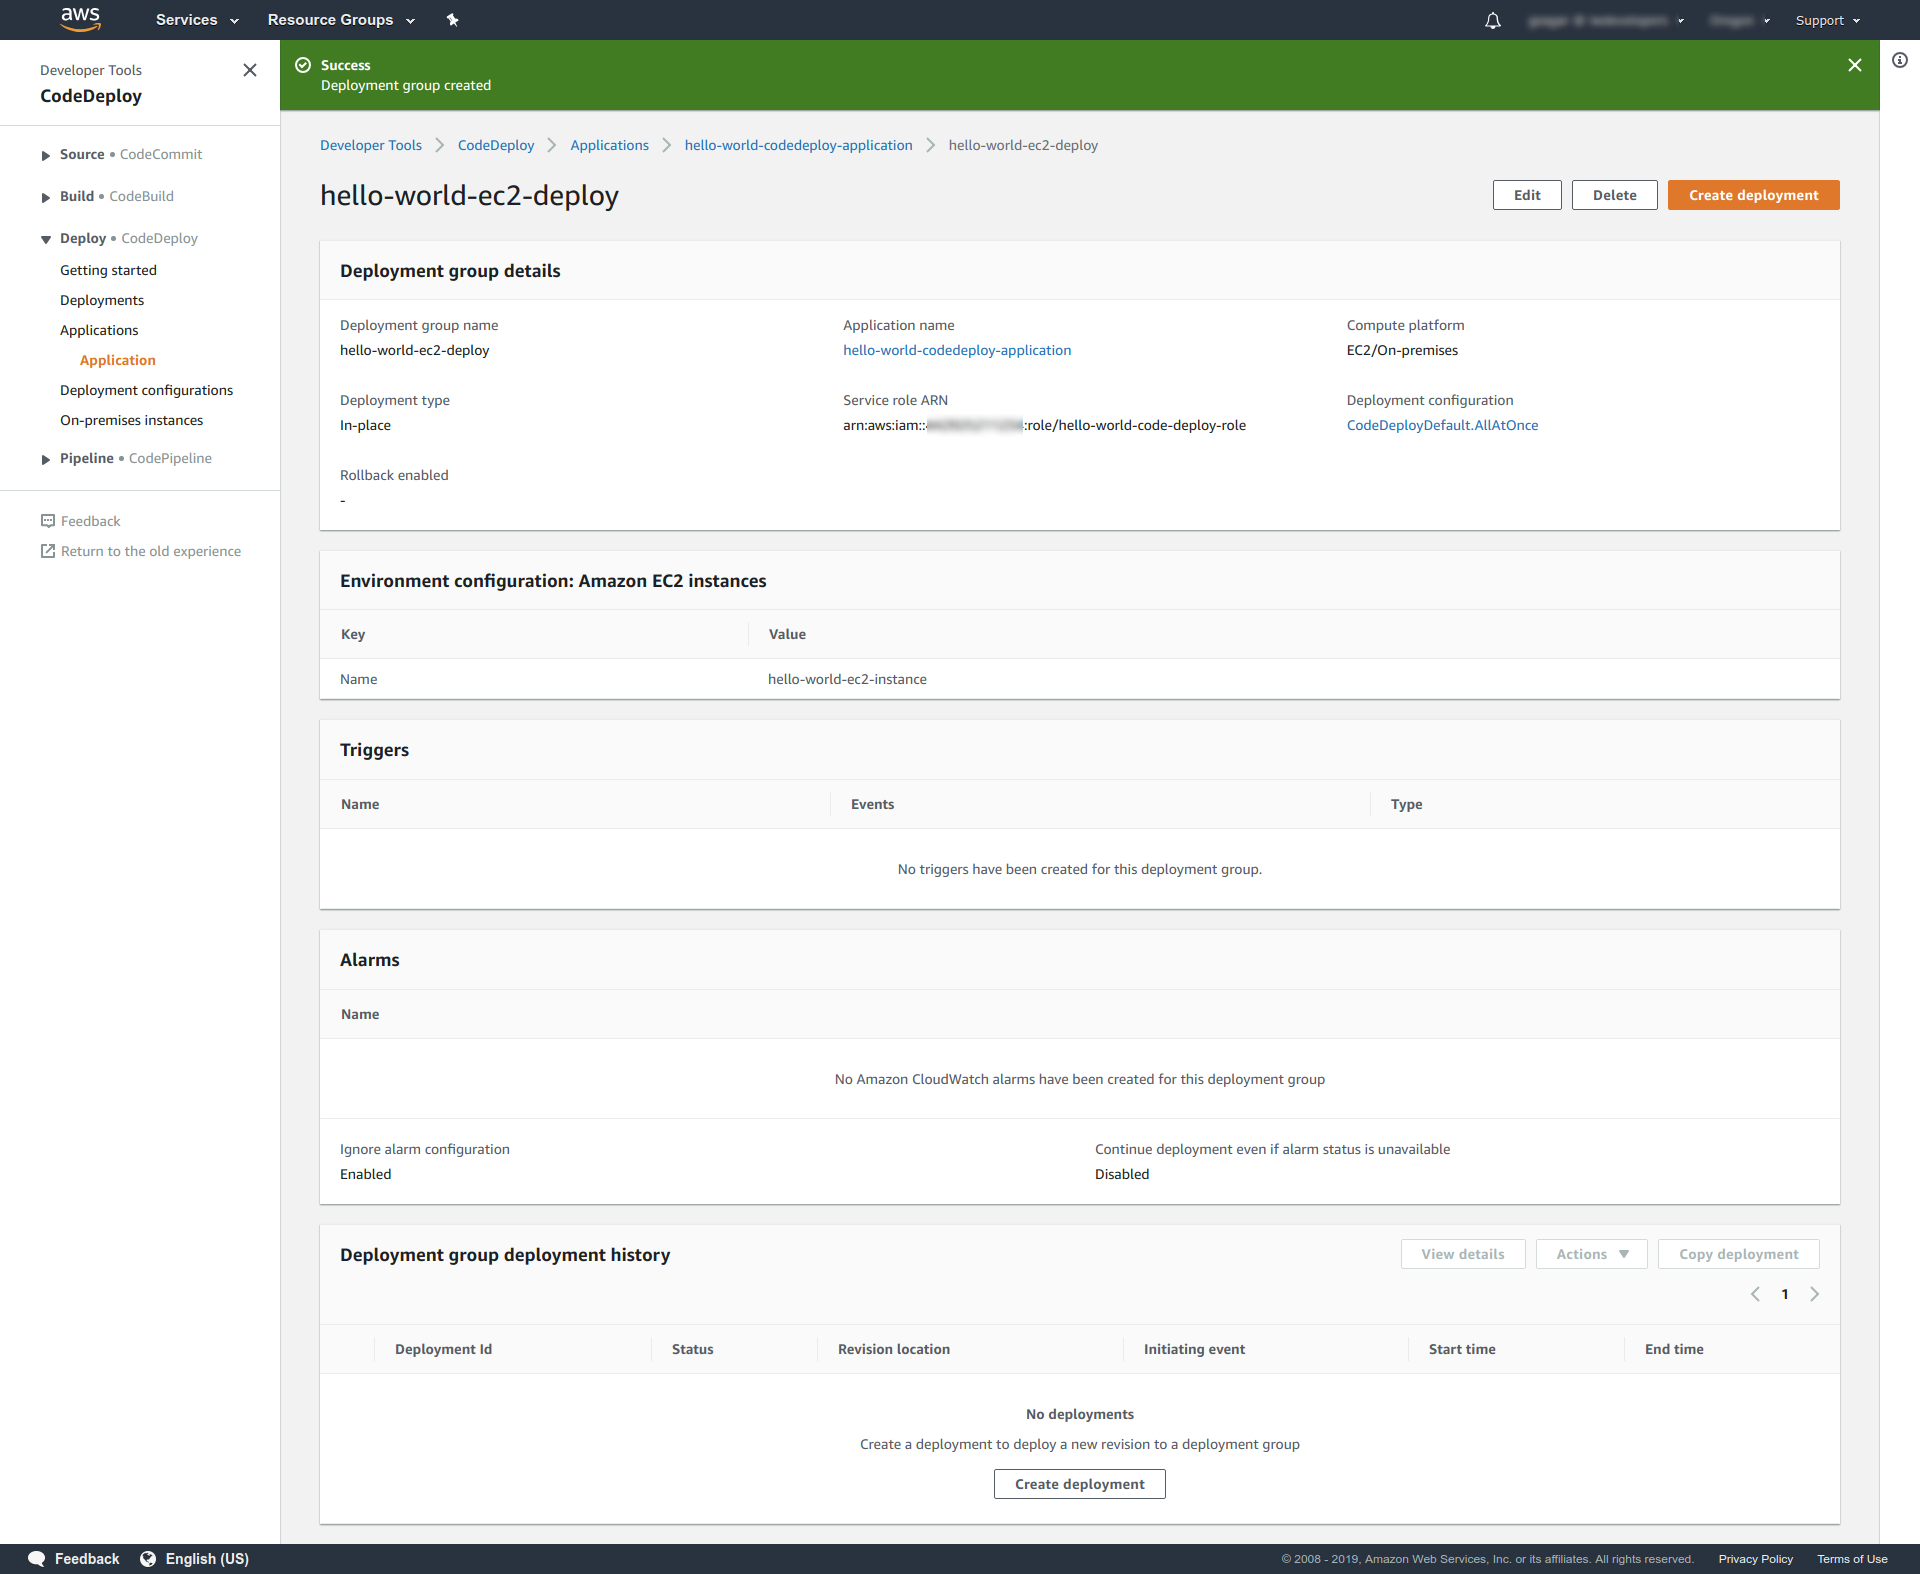
Step 10
- Now go to Step 6 where you've left off. Since, we've just created CodeDeploy application and Deployment group. Select those values in specific fields. If they are not populated under the select dropdown, just refresh the page and you'll be fine.
- Click Next button and go to Step 11
Step 11
- This is probably the last step of our code pipeline setup. After clicking the Next button from Step 10, you'll see a CodePipeline Review page.
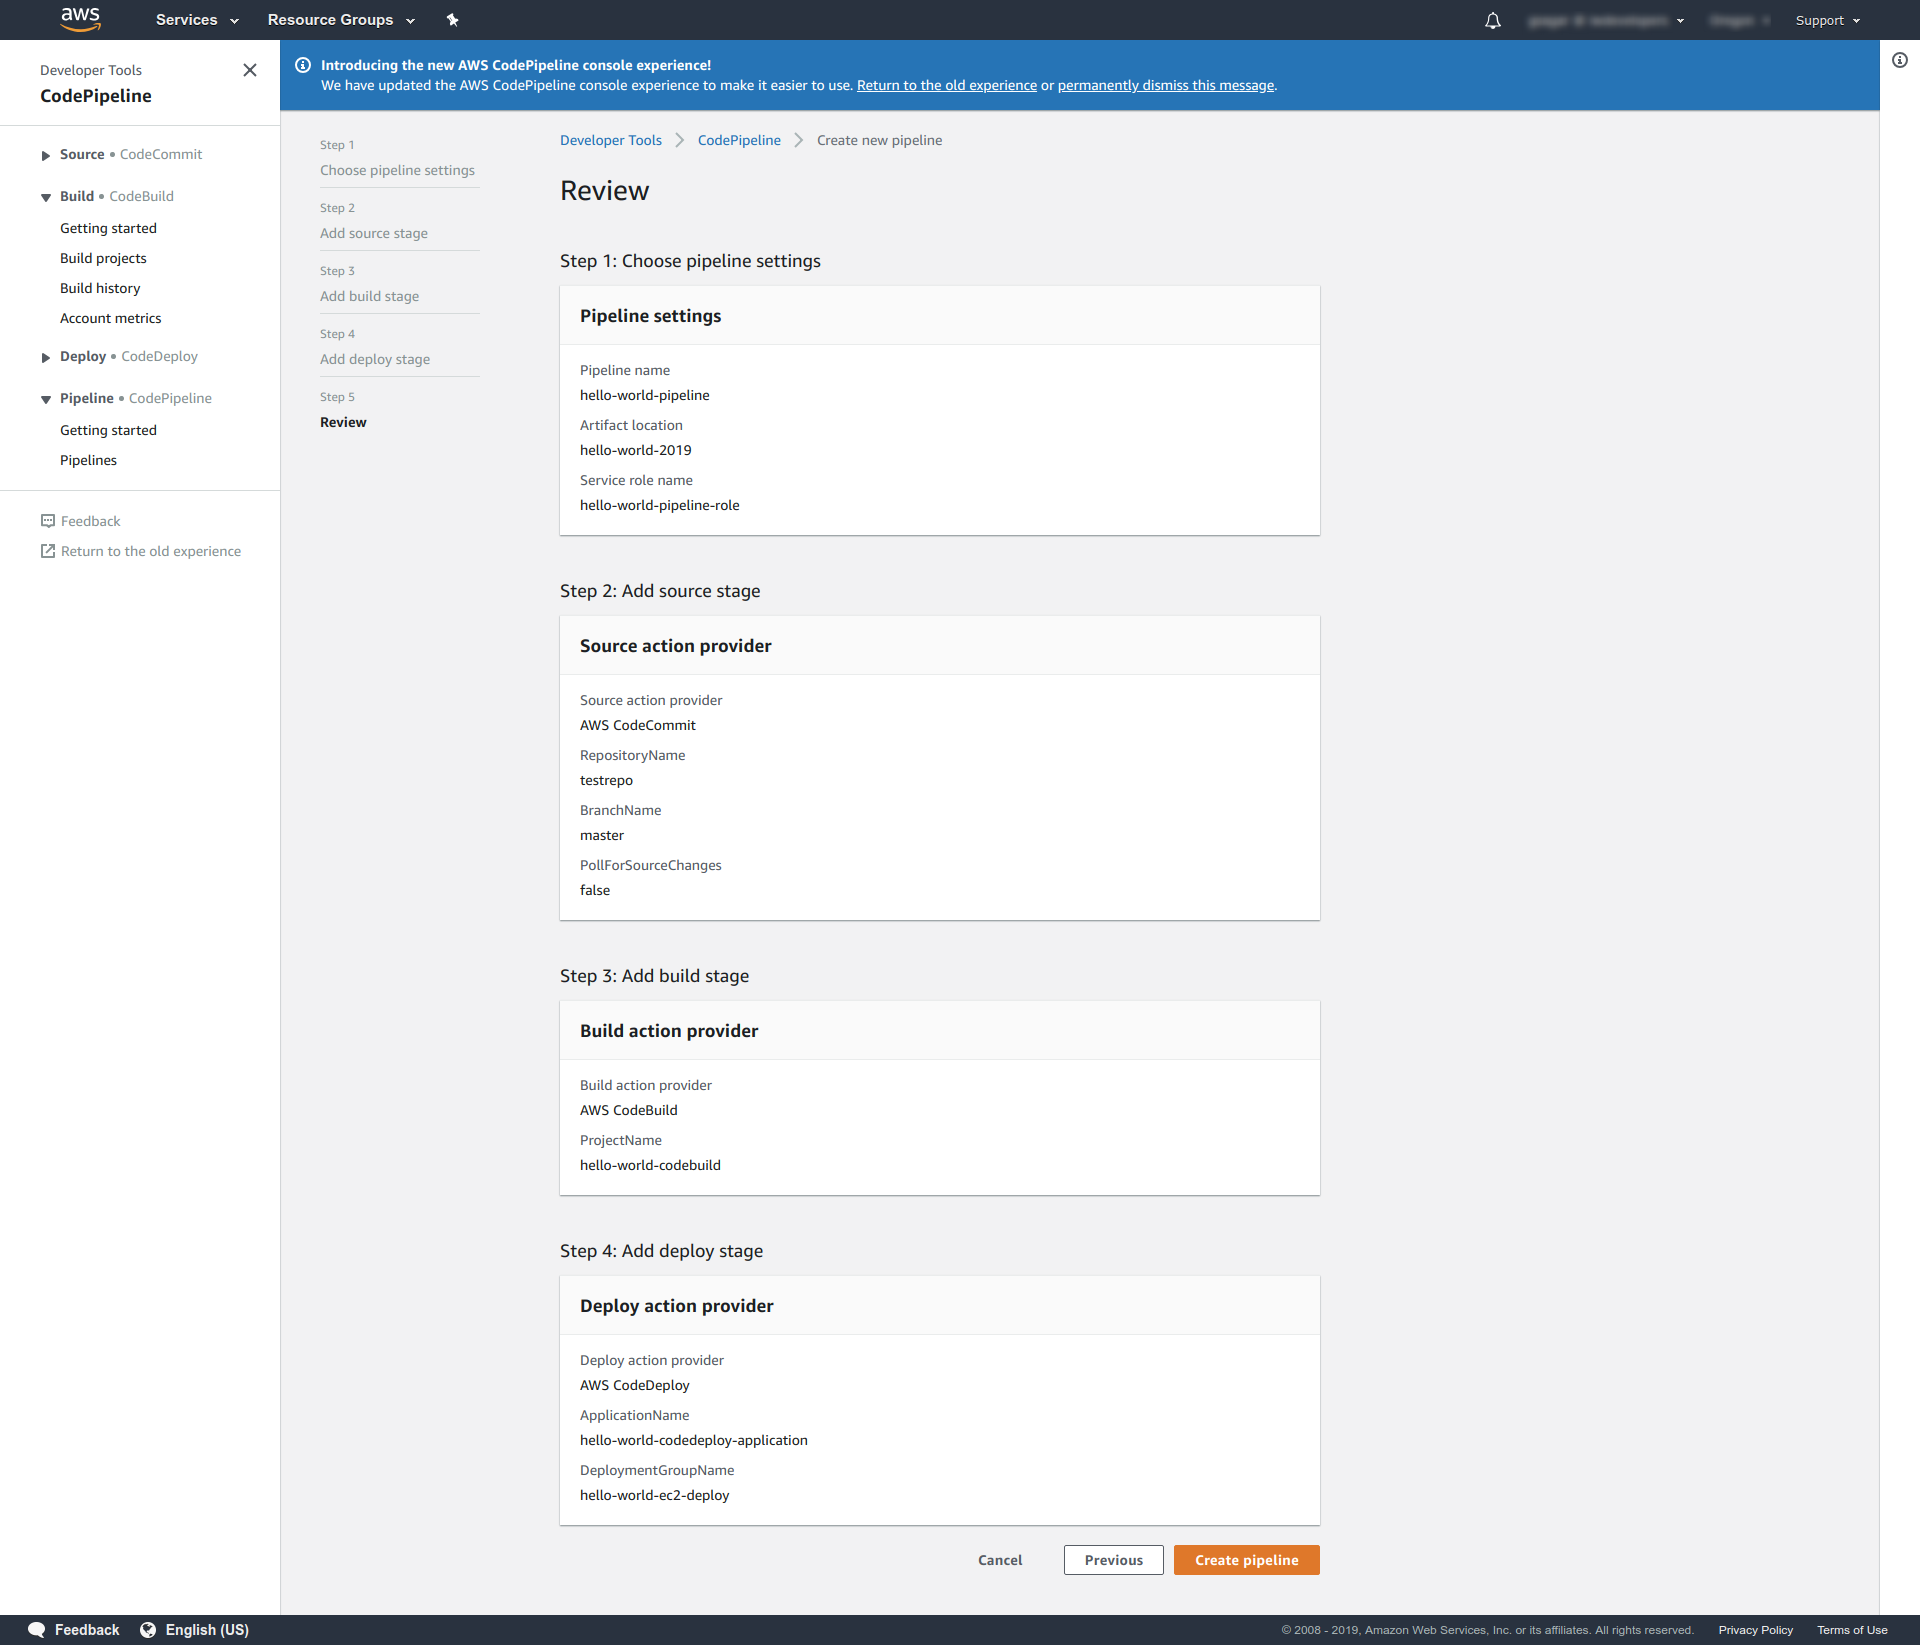
- Just go through it and check if everything is setup correctly
- If you need to change something, go to previous section. And if you think everything is fine, click on Create pipeline button
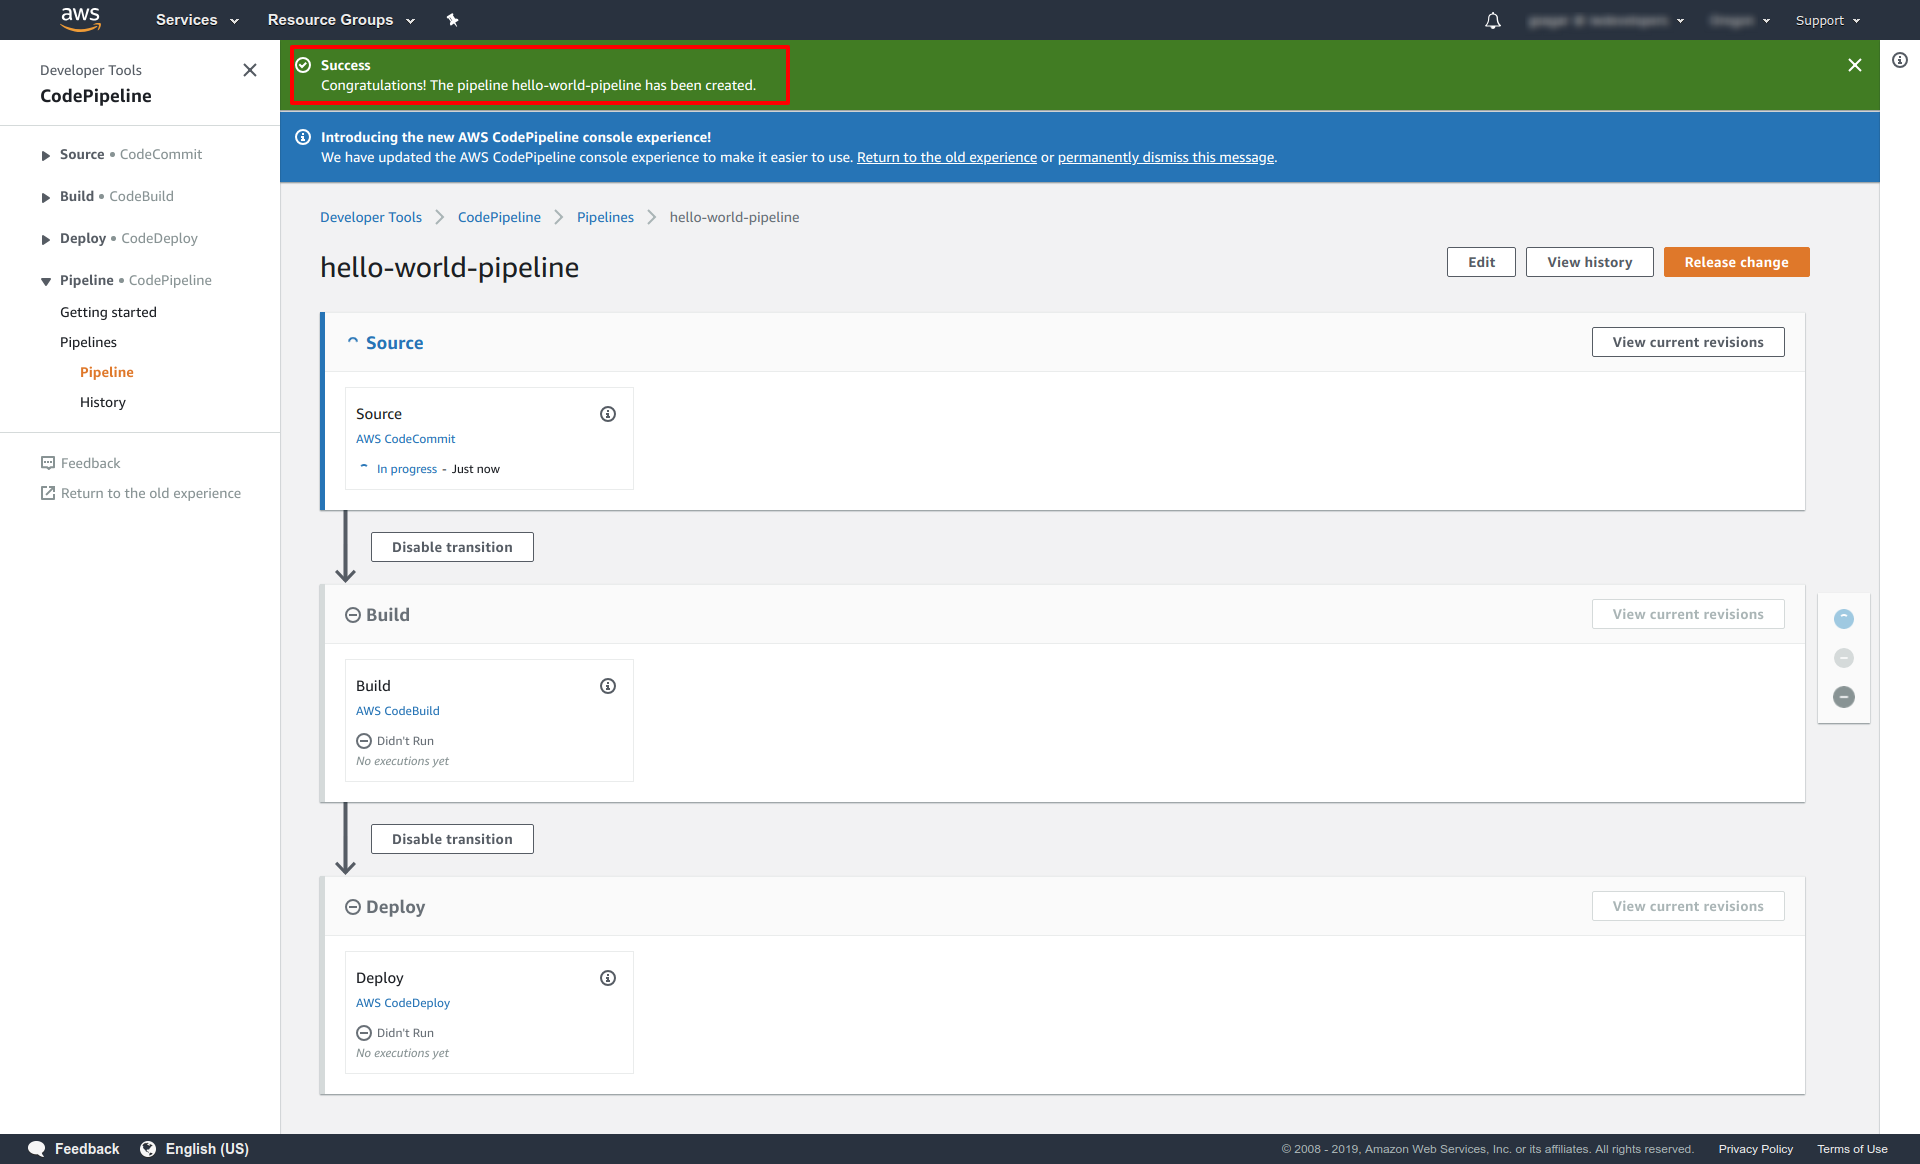
Step 12
- You'll see a success page something like this.
Step 13 (Create buildspec.yml file)
At this point, your pipeline will obviously fail in the Build section because we haven't setup the buildspec.yml file.
Here's a buildspec.yml file that I setup for my django project pipeline. Take a reference and change accordingly.
**I'll be writing a separate post on what's going inside the buildspec.yml file. But, for now just copy-paste this in your buildspec.yml file and push it to your repository.
Step 14 (Create appspec.yml file)
Your CodePipeline will still fail on Deploy part because we haven't still setup an appspec.yml file yet. This file is used by the CodeDeploy to deploy our application to the EC2 instance.
Here's the configuration for my appspec.yml file that I setup for my django project pipeline. Take a reference and change it accordingly.
After this, your CodePipeline should be Green.